People choose to hide their wireless network or WiFi for various reasons. The main reason is all about security. It is crucial to prioritize the security of your home connection with increasing concerns about internet security and the potential compromise of WiFi networks. One way to enhance security is using a hidden WiFi network that doesn’t broadcast its name. Although these networks are not visible in the list of available networks, you can still connect to them if you have the SSID (name) and other security details. In this tutorial, I will guide you through connecting to a hidden WiFi network in Windows 10, ensuring your connection is secure and reliable.
To begin with, configure your router and input the required details to set up your WiFi hotspot and ensure its hidden status.
When you connect to a WiFi or wireless network broadcasting its signal, the network configuration automatically handles most of the setup process. Enter the password and click “Connect” to establish a connection. However, connecting to a hidden network requires the manual entry of security information. You need to know the necessary details and input them manually to connect to a WiFi network.
Now, you can try accessing your router’s configuration menu by typically entering its IP address (e.g., 192.168.11.1) into your browser’s address bar.
Enter the username, usually set as “Admin,” and change the default router password for security purposes. Navigate to the wireless settings section and enter your network’s name (SSID) and security type. If your network uses WEP, take note of the WEP key. For WPA-PSK or WPA2-PSK, note the Pre-shared key. If you’re not using any security, you’ll only need the SSID, but it is advisable to choose WPA2-PSK and select AES as the encryption option.
Note: Before you try to connect, make sure you are within the range of your network, which is usually 100 meters long.
Now connect to your hidden Wi-Fi using a Windows 10
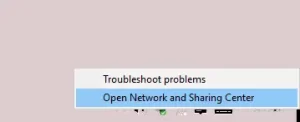
The first thing to do is to right-click and open the Network and Sharing Center, as shown in the image below.
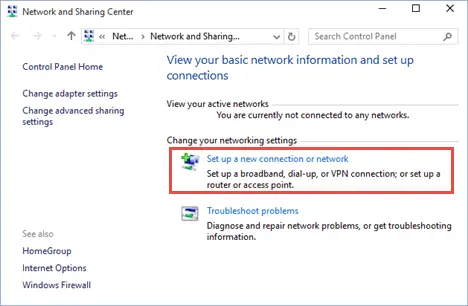
In the Network and Sharing Center dialog box, click or tap on “Set up a new connection or network.”
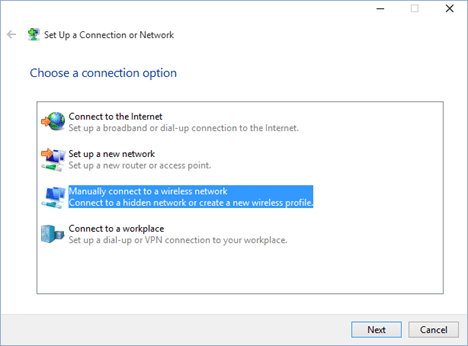
Select “Manually connect to a wireless network” and click or tap Next.
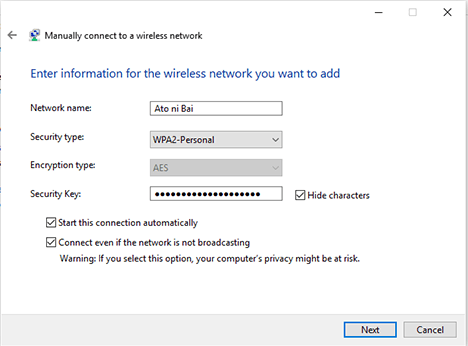
Enter the security info for your wireless network in the appropriate fields as follows:
- Type the SSID into the Network name field.
- Select the appropriate security type for the hidden wireless network in the Security Type field. Some routers might refer to this as the authentication method. Depending on the security type you select, Windows may or may not prompt you to specify an encryption type.
- Enter the password for the wireless network in the Security Key field.
- To prevent others from seeing the password check the box that says “Hide characters.”
- To connect to this network automatically, check the box that says “Start this connection automatically.”
- You should also check “Connect even if the network is not broadcasting.”
Fill in the necessary information, and press Next.
Windows 10 will notify you that it has successfully added the wireless network. Press Close and you have completed the process.
Once you are within the network’s range, Windows 10 will automatically connect to it for you, as depicted in the image below.

Conclusion
If you have followed the instructions attentively, you should encounter no issues. However, if you are still unsure or need further guidance, I have included a helpful YouTube video in the featured section of this post.


Hi there,
Just wanted to say that I love your content. Keep up the good work.
My friend Jordan from Thailand Nomads recommended your website to me.
Cheers,
Virginia