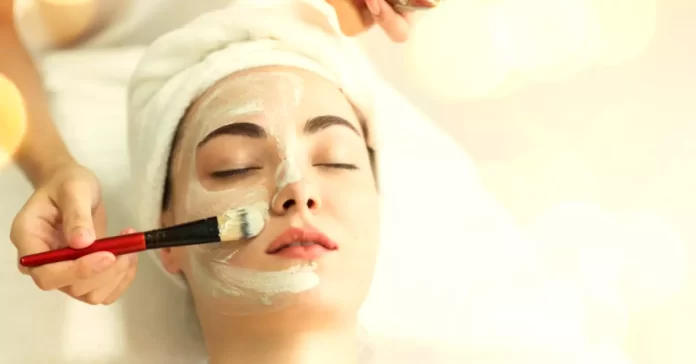
You can achieve radiant skin without the need for expensive treatments or products. This homemade wonder offers a cost-effective and straightforward approach to achieving glowing skin.
These masks deliver a spa-like experience with natural ingredients, all without the hefty price tag. Embrace the simplicity and efficacy of DIY skincare for a radiant complexion.
Here are The 9 Best DIY Facial Masks You Need to Try for Glowing Skin
Honey and Oatmeal Mask
Combine honey and oatmeal for a soothing mask that hydrates and exfoliates. Honey has antibacterial properties that can help acne, while oatmeal gently removes dead skin cells.
Ingredients and Properties:
- Honey: Acts as a natural humectant, locking in moisture and promoting a supple complexion.
- Oatmeal: Contains antioxidants and anti-inflammatory properties, soothing irritated skin.
Steps to Prepare and Apply:
1 Mix honey and finely ground oatmeal to form a paste.
2 Apply the mixture to clean dry skin, avoiding the eye area.
3 Gently massage in circular motions to exfoliate.
4 Leave the mask on for 15–20 minutes.
5 Rinse off with warm water and pat dry.
Benefits for the Skin: - Hydrates and moisturizes, reducing dryness.
- Calms and soothes irritated or sensitive skin.
- Gently exfoliates to enhance skin texture and promote smoothness.
- Enhances overall skin radiance.
Caution:
Perform a patch test on a small area to ensure no allergic reactions. If you have oat allergies, avoid using this mask. Use a gentle, upward motion when applying and removing the mask.
Avocado and Yogurt Mask
Mash ripe avocado with yogurt for a creamy mask rich in vitamins and probiotics. This combination moisturizes and brightens your complexion.
Ingredients and Properties:
- Avocado: Rich in vitamins and fatty acids, nourishes and hydrates the skin.
- Yogurt: Contains lactic acid for gentle exfoliation and probiotics for a healthy skin barrier.
Steps to Prepare and Apply:
1 Blend a ripe avocado and yogurt to create a smooth paste.
2 Evenly apply the mask to your face.
3 Leave on for 15–20 minutes.
4 Rinse your face with lukewarm water and gently pat it dry.
Benefits for the Skin: - Deeply moisturizes and softens the skin.
- It Enhances skin elasticity.
- It provides a natural glow.
Caution:
Before applying the mask, conduct a patch test to ensure no adverse reactions. Adjust ingredients for skin sensitivity.
Turmeric and Chickpea Flour Mask
Turmeric has anti-inflammatory properties with chickpea flour, creating a mask that combats blemishes and enhances an even skin tone.
Ingredients and Properties:
- Turmeric: Anti-inflammatory and brightening properties.
- Chickpea Flour: Acts as a gentle exfoliant and absorbs excess oil.
Steps to Prepare and Apply:
1 Create a paste by mixing turmeric and chickpea flour with water or yogurt.
2 Apply the paste to your face, avoiding the eye area.
3 Leave on for 15–20 minutes.
4 Rinse off with lukewarm water.
Benefits for the Skin: - It reduces inflammation and redness.
- Exfoliates, promoting a smoother complexion.
- Adds a natural radiance.
Caution:
Turmeric may temporarily stain the skin, so be cautious with clothing and towels. Avoid if you have turmeric allergies.
Banana and Coconut Oil Mask
Blend bananas with coconut oil for a hydrating mask that softens the skin, providing enhanced hydration through the vitamins in bananas and the moisturizing properties of coconut oil.
Ingredients and Their Properties:
- Banana: Rich in vitamins and antioxidants, it nourishes the skin and promotes a youthful glow.
- Coconut Oil: Provides deep hydration and has antimicrobial properties, ideal for softening and soothing the skin.
Steps to Prepare and Apply:
1 Mash a ripe banana until smooth.
2 Add a tablespoon of coconut oil and mix well.
3 Apply the mixture onto clean and dry skin.
4 Leave it on for 15–20 minutes.
5 Rinse off with warm water and pat your skin dry.
Benefits for the Skin: - Hydrates and moisturizes dry skin.
- Combats signs of aging while enhancing a supple complexion.
Caution:
Perform a patch test to verify for any allergic reactions. Adjust the coconut oil quantity for your skin type; it can be heavy for some.
Aloe Vera and Cucumber Mask
Combine aloe vera gel with cucumber for a refreshing mask that calms irritated skin and reduces puffiness. Ideal for a spa-like experience in the comfort of your home.
Ingredients and Properties:
- Aloe Vera: Soothes and hydrates the skin with anti-inflammatory properties.
- Cucumber: Refreshes, reduces puffiness, and provides a cooling effect.
Steps to Prepare and Apply:
1 Extract fresh aloe vera gel or use store-bought gel.
2 Create a smooth mixture by blending cucumber and combining it with aloe vera gel.
3 Evenly apply the mask to your face.
4 Leave on for 15–20 minutes.
5 Rinse with cold water.
Benefits for the Skin: - Calms and hydrates sensitive or irritated skin.
- It reduces under-eye puffiness.
- It leaves the skin feeling refreshed.
Caution:
Check for aloe vera allergies by doing a patch test. Avoid applying the mask near the eyes.
Papaya and Pineapple Enzyme Mask
The enzymes in papaya and pineapple help remove dead skin cells and promote cell turnover. This mask leaves your skin looking rejuvenated.
Ingredients and Properties:
- Papaya: Contains enzymes like papain for gentle exfoliation and brightening.
- Pineapple: The enzyme bromelain in pineapple helps eliminate dead skin cells.
Steps to Prepare and Apply:
1 Mash ripe papaya and pineapple in a bowl.
2 Mix until you get a smooth paste.
3 Even apply the mask on your face.
4 Leave on for 10–15 minutes.
5 Rinse with lukewarm water.
Benefits for the Skin: - Exfoliates and brightens the skin.
- Promotes smoother skin by efficiently eliminating dead skin cells.
- It naturally provides a glow.
Caution:
Conduct a patch test to ensure no allergies. Avoid the eye area.
Green Tea and Lemon Mask
Brew green tea and mix it with a squeeze of lemon for a mask rich in antioxidants. This combination can help with inflammation and brighten your complexion.
Ingredients and Properties:
- Green Tea: Rich in antioxidants, reduces inflammation, and soothes the skin.
- Lemon: Contains vitamin C, which brightens and tightens the skin.
Steps to Prepare and Apply:
1 Brew a cup of green tea and allow it to cool down.
2 Mix the green tea with freshly squeezed lemon juice.
3 Stir until well combined.
4 Apply the mask to your face, avoiding the eye area.
5 Leave on for 15–20 minutes.
6 Rinse off with cool water.
Benefits for the Skin: - Combats free radicals and encourages youthful-looking skin.
- Brightens and evens out the skin tone.
- It eliminates inflammation and redness.
Caution:
Lemon juice may irritate some; do a patch test. Limit sun exposure after using lemon, as it can increase sensitivity.
Clay and Rosewater Mask
Create a detoxifying mask by mixing clay with rosewater, drawing out impurities, and tightening pores for an ideal weekly deep cleanse.
Ingredients and Properties:
- Clay (such as Bentonite or Kaolin): Absorbs impurities, unclogs pores, and controls excess oil.
- Rosewater: Hydrates, soothes, and balances the skin’s pH.
Steps to Prepare and Apply:
1 Mix clay powder with rosewater to form a smooth paste.
2 Adjust the ratio for your desired consistency.
3 Apply an even layer to your face, avoiding the eyes and lips.
4 Allow it to dry for 15–20 minutes.
5 Rinse off with lukewarm water.
Benefits for the Skin: - Deep cleanses and detoxifies the skin.
- Achieves a natural glow by eliminating excess oil.
- Calms and refreshes the skin with the gentle properties of rosewater.
Caution:
Clay masks may be drying, so follow with a moisturizer. If you have sensitive skin, do a patch test to check for adverse reactions.
Strawberry and Honey Mask
Mash strawberries with honey for a mask that is high in vitamin C. This combo can help fade dark spots and give your skin a radiant boost.
Ingredients and Properties:
- Strawberries: Rich in antioxidants, brighten the skin, and contain alpha hydroxy acids for gentle exfoliation.
- Honey: Moisturizes, soothes, and has antibacterial properties.
Steps to Prepare and Apply:
1 Mash fresh strawberries into a pulp.
2 Mix the strawberry pulp with honey to create a smooth mixture.
3 Apply the mask to your face, avoiding the eye area.
4 Leave it on for 15–20 minutes.
5 Rinse off with lukewarm water.
Benefits for the Skin: - Exfoliates and brightens the skin for a radiant complexion.
- Hydrates and nourishes the skin with the natural goodness of honey.
Caution:
Conduct a patch test if you have strawberry allergies. Properly rinse off honey to avoid attracting ants.
Conclusion
Experiment with these DIY facial masks to discover which works best for your skin type. Address dryness, blemishes, and dullness with natural solutions that give you a glowing complexion. The journey to admiring skin can be enjoyable and personalized.
Frequently Asked Questions (FAQs)
Are DIY facial masks suitable for all skin types?
Yes, customizing many DIY masks for different skin types is possible. It is vital to choose ingredients that align with your specific skin needs.
How often should I use a DIY facial mask?
The frequency depends on the mask and your skin type. Observing how your skin responds is essential when using the mask once or twice weekly.
Can I store DIY masks for later use?
Some masks are best prepared fresh due to the natural ingredients. However, you can refrigerate certain mixtures briefly. Always check each mask’s guidelines.
What if I am allergic to certain ingredients?
Perform a patch test before applying any mask to your face. If you have allergies or sensitivities, consult a dermatologist and avoid ingredients that may trigger a reaction.
What is the recommended duration for leaving a facial mask on?
The recommended duration varies, but the usual timeframe is about 10–20 minutes. It is vital not to exceed the suggested time to prevent skin irritation.
Can DIY masks replace professional skincare products?
While DIY masks offer numerous benefits, they may not replace all aspects of a professional skincare routine. Consider incorporating both for a well-rounded approach.
Do these masks help with specific skin concerns like acne or dryness?
Yes, many DIY masks target specific skin concerns. Seek out ingredients renowned for tackling concerns such as acne, dryness, or dullness, tailored to your particular needs.
Are there any side effects of using DIY facial masks?
When used correctly, DIY masks are generally safe. However, everyone’s skin reacts differently. If you experience irritation or discomfort, discontinue use and consult a skincare professional.


